Creating the Technical Fields

Contents
Process:
•Creating Technical Fields with the EPU-Object Inserter.
Requirements:
Description:
A Technical Field is an Area object in ProSig and is created, only when required.
In the PlanPro glossary, the object is formulated as follows:
Technical Field (Technischer_Bereich)
Description of other dot-like objects in the data model.
These are provided by external systems or added manually during planning. They only serve as information for planning decisions.
(Source: PlanPro Glossary)
Supporting video sequence:
Erzeugen_Technischer_Bereiche.mp4 (Size 7,1 MB)
Procedure:
1.Start EPU-Object Inserter and select the Object type 'Technical Field'.
Command Line: PRS_EPU_EINF
Ribbon: ProSig EPU -> Equipment SCT -> EPU-Object Inserter
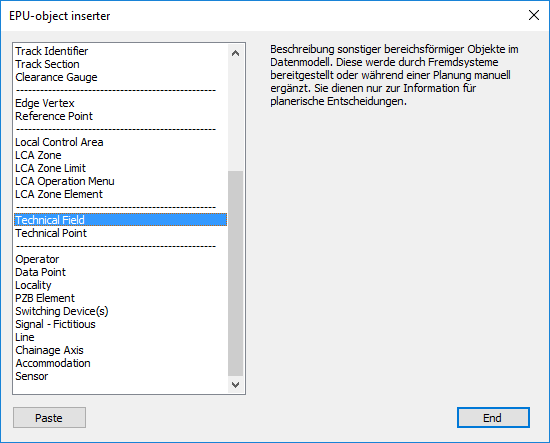
Illus.: Selection of the Object Type 'Technical Field' in the EPU-Object Inserter
2.The button 'Paste' is used to create a new area object 'Technical Field' in the drawing.
oDuring the insertion, the boundary points of the range on the topological edge (layer PRS-TOPOLOGICAL EDGE) have to be selected. Exit the selection with the Enter key.
oThe Technical Field is a PSO-Area Object.
oAfter the creation, the technical field is represented on the track set and stored on the layer PRS-TECHNICAL FIELD.
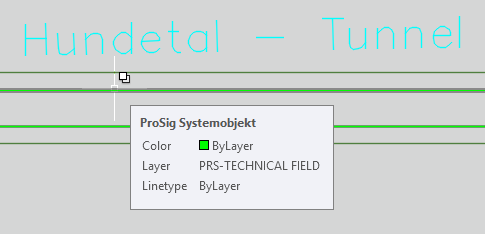
Illus.: Representation of a Technical Field in the Project Drawing
3.After the insertion, all relevant data should be specified using the function Edit Object(s).
Command Line: OE
Ribbon: ProSig EPU -> Tools -> Edit Object(s)

Illus.: Attributes of a Technical Field
oThe value of the attribute 'Description' (A) should be a verbal description or the name of the technical field.
oFor the Attribute 'Type' (B) the type of the technical field is specified. Depending on the type, it is represented in the drawing.
▪For the representation of underground tracks the type 'Tunnel', 'Durchlass' or 'Brücke' can be selected.
▪For indicating the presence of a safety barrier, the type 'Schutzwand' can be selected.