Creating and Assigning Comments
Process:
•Creating and assigning comments to ProSig objects
•Creating free text comments and comments to which attachments are assigned
Requirements:
Description:
Comments can be created in ProSig as free-text comments and assigned to an object or object attribute using the Edit Object(s) function.
A comment can be assigned to any object in the project using the attribute 'Bearbeitungsvermerk'. When the objects are exported to the corresponding PT1 tables, the attribute 'Bearbeitungsvermerk' is entered in the 'Note' column of the respective object.
In the PlanPro glossary, the object for displaying a Edit note is formulated as follows:
Comment (Bearbeitungsvermerk)
Attachment in the form of a file or text to an object or attribute.
Each authorized project member can add an edit note (Bearbeitungsvermerk) to an object or attribute, as long as they have the necessary authorization. This applies to technical and organizational objects and attributes.
For ENUM attributes, a Edit note should be added when the value 'sonstige' is selected. Document attachment is optional.
Several edit notes can be created for an object or attribute. The Edit note temporarily contains a GUID for identifying the processor and a GUID for the signature. In the attribute 'Bearbeitungsvermerk Rolle', the effective role of the user can be stored. Comments of the user are stored as user-defined text in the 'Comment' attribute. The Edit note can include an attachment. To assign several attachments to an object, several edit notes have to be created.
(Source: PlanPro Glossary)
Procedure:
1.To create and edit a comment in the project continue with Step 2.
To assign an existing comment to an object, continue with Step 4.
To create and assign a comment to a attribute, continue with Step 5.
2.The function 'Comments' can be used to create a comment in the project.
Command Line: PRS_KOMMENTAR
Ribbon: ProSig EPU -> Planning Basis -> Comments

Illus.: Dialog BearbeitungsVermerksEditor
oIf comments already exist in the project, they are displayed in the dialog.
oThe 'New' (A) button can be used to create a new comment. Then you have to specify the insertion point and the insertion angle for positioning the comment in the drawing.
oThe 'Delete' (F) button can be used to remove an existing comment from the project after selecting it in the dialog.
3.After creating a new comment, the attributes should be assigned.
oThe 'Comment' attribute (B) should be filled with the comment of the editor as free text.
oThe 'Short text' attribute (C) should be filled with a short description for the comment. The Short text is used when assigning a comment to an object, see also Step 5.
oThe 'Inventory-relevant' attribute (D) can be used to specify whether the comment (B) is to be displayed in the drawing or not.
▪Inventory-relevant comments are displayed in the drawing and should be checked again by the SCT technical planner before creating the inventory data, since they may not have been necessary for individual planning.
▪Comments that are not inventory-relevant are not displayed in the drawing.

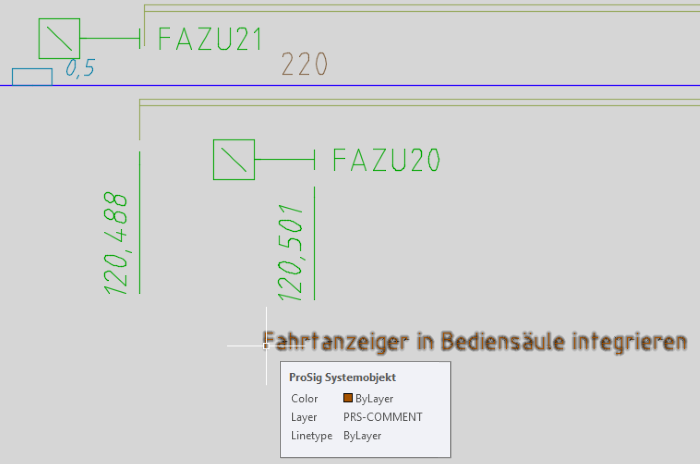
Illus.: Representation of the free text comment in the drawing
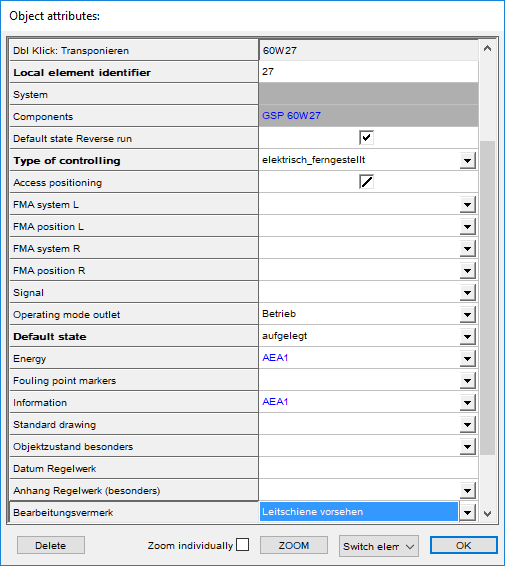
4.For the assignment of an existing comment to any object, the comment can be selected via the attribute 'Bearbeitungsvermerk'. The Short text of the comment is then displayed in the attribute. During the Export of the objects to the corresponding PT1 tables, the value of the attribute 'Bearbeitungsvermerk' is entered in the 'Note' column of the respective object.

Illus.: Assigning a comment to the 'Bearbeitungsvermerk' attribute
5.To create and assign a comment to an attribute the function Edit Object(s) can be executed. Then select the object in the drawing to which the comment is to be assigned.
Command Line: OE
Ribbon: ProSig EPU -> Tools -> Edit Object(s)

Illus.: Example OE on a signal - Open the Context Menu
oRight-click on the value field of an attribute to open the context menu. Select the menu item 'Define Comment/Attachment' (G).
6.The Comment/Attachment Editor is displayed. The 'Comments' tab is selected.

Illus.: Dialog Comment/Attachment Editor
oIf comments already exist in the project, they are displayed in the 'Comments' (H) area.
oIf comments are already assigned to the selected attribute, they are displayed in the bottom Area (I) of the dialog.
oThe Creation of a comment can be performed with the button 'New' (J). The attributes of the comment must then be filled, see also Step 3.
oIf a new attachment is to be assigned to the comment, this can be performed via the button 'Define Attachment' (L). A file for which an attachment is to be created must be selected via the file selection dialog.
7.The Deletion of a comment can be performed via the button 'Delete' (K). In this case, first select the comment in the 'Comments' list (H).
8.The Assignment of a comment to a attribute can be performed via the button 'Assign' (M). For this the comment has to be marked before in the list 'Comments' (H). The comment is then displayed in Area (I).
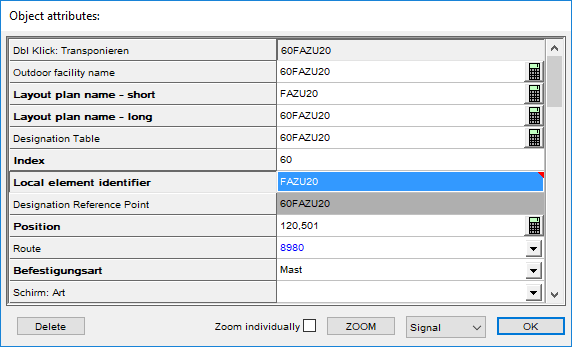
oAfter closing the Comment/Attachment editor, a red triangle is displayed for the attribute selected in Step 5.

Illus.: Example OE on a Signal - Assigned Comment
oBy clicking with the left mouse button on the red triangle, the Comment/Attachment editor is opened again and all comments assigned to the attribute are displayed in the bottom Area (I) of the dialog.
9.The Removal of a comment from an attribute can be performed via the button 'Remove' (N). To do this, the comment must first be marked in Area (I). Only the assignment of the comment to the attribute is removed. The comment remains in the project.
oIf all assigned comments have been removed from an attribute, a red triangle is no longer displayed for the corresponding attribute after closing the Comment/Attachment editor.
